Background Information:
It's a common complaint among thirdgen firebird owners to hear: "My dashboard
lights don't turn on when i turn on the headlights". Not being able to see
the speedometer at night is dangerous and potentially expensive if a speeding
ticket is received.
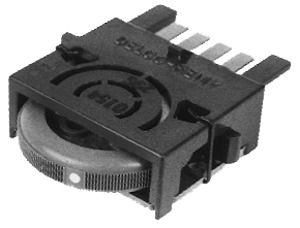
1985-1992 firebirds use an NPN power transistor called a "remote dimmer"
to control the brightness of the instrument panel backlighting. 1982-1984
firebirds do not have a "remote dimmer", nor do any thirdgen camaros regardless
of model year.
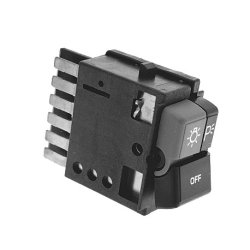
The remote dimmer works behind the scenes, the only interaction with the
vehicle operator is through the dimmer wheel located near the headlight switch.
Below are the electrical wiring diagrams for instrument panel illumination:
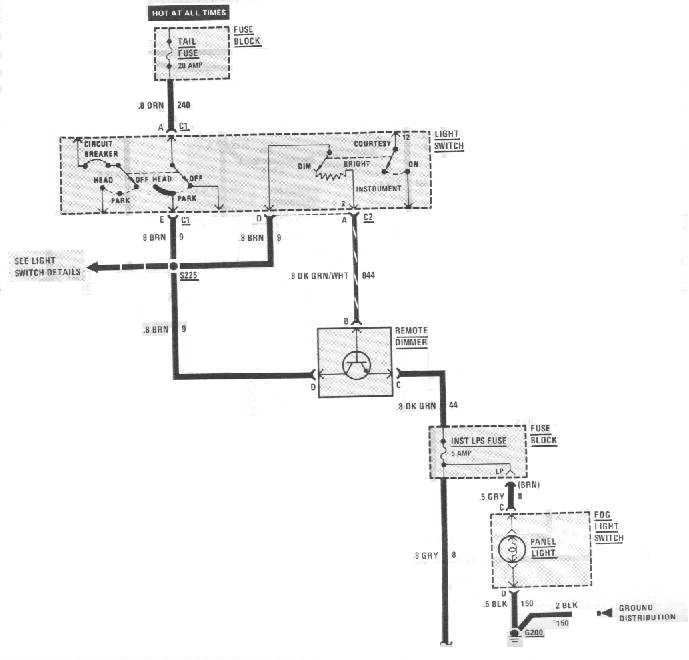
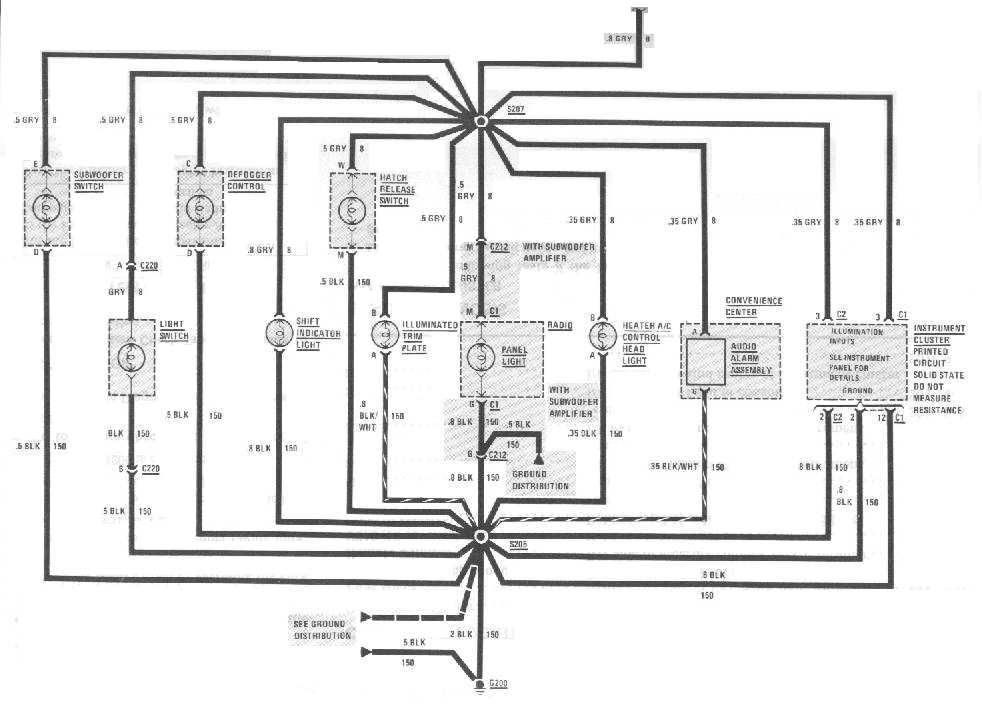
As can be seen by the diagrams above, the speedometer, fuel guage, tachometer
(if so equipped), water temp guage (if so equipped), and gear selector indicator
are supposed to be illuminated when the headlights or parking lamps are turned
on.
If the remote dimmer were to be removed from the circuit pictured above,
no power would be applied to the "INST LPS" fuse. Transistors sometimes suddenly
fail and never again conduct electricity. But a more common scenario would
be that the transistor works intermittently, sometimes the dash lights work,
but sometimes they don't turn on when the headlights are turned on.
The headlight warning buzzer also gets headlamp on signal from the remote
dimmer. Additionally the factory radio receives an illumination signal from
the remote dimmer. If the remote dimmer has failed, the factory radio display
will completly blank out whenever headlamps are turned on.
Diagnostics:
First make sure that the exterior taillamp bulbs illuminate when the headlamp
switch is turned on. If the bulbs do not illuminate, correct the parking
light issue before proceding.
With the headlamps turned on, remove the fuse panel cover and remove the
"TAIL" and "INST LPS" fuses. Attach one lead of a voltmeter to a suitable
grounding location such as a metal screw or metal dashboard support bracket.
Now touch the positive lead of the voltmeter to each of the two terminals
of the taillamp fuse socket one at a time. One terminal should read approximetetly
12Volts. If neither of the terminals has a reading, find an alternate grounding
location and try the procedure again. If readings still do not register,
repair or replace the defective voltmeter. Now place the taillamp fuse back
into it's socket.
Attach the positive terminal of the voltmeter to each terminal of the "INST
LPS" fuse socket one at a time. While holding the voltmeter probe in the
fuse socket, turn the instrument panel dimmer wheel. If any readings significantly
above 0 volts are received and the dashboard lights are not illuminated,
the problem is probably not with the remote dimmer. Carefully inspect the
fuse, wiring between the fuse and bulb sockets, grounds, and the bulbs themselves.
G200 is located below the drivers dash and attached to the metal dash support.
It is possible for all the bulbs to burn out, but is not likely.
Now turn off the headlamps to prevent battery drain.
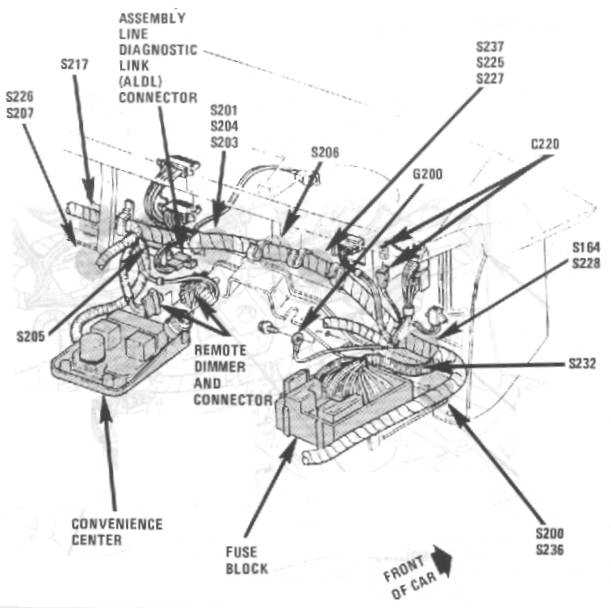
Remote Dimmer Replacement:
First part of replacing the remote dimmer is finding it (it's well hidden
and difficult to locate). Remote dimmer is located on the metal dashboard
support bracket on the bottom of the dash. The dashboard support bracket
has a big U-shape to it above the steering column. The remote dimmer is located
on the side of the U towards the passengers side of the car, behind the ALDL
diagnostic connector and above the convience cluster that houses the turn
signal flasher and seatbelt/headlight/key in ignition buzzer. To access the
buzzer, you'll need to remove the drivers underdash panel and lower the convience
cluster.
Now that the remote dimmer has been located, reach up in the dash and unbolt
it.
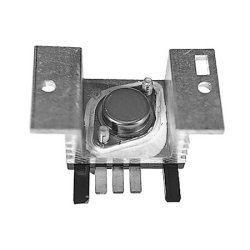

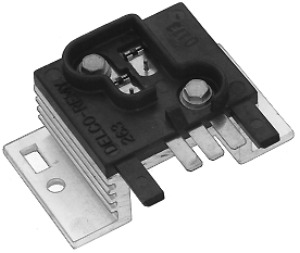
Will be three wires on the remote dimmer connector (brown, dark green, and
dark green with white stripe). If the brown wire is shorted together with
the dark green wire, the dash lights will turn on at full brightness with
no dimming if the headlamps are turned on. If instrument panel lamp dimming
capability is desired, replace the remote dimmer transistor assembly.
Are two choices for replacement:
Replace the entire remote dimmer assembly complete with heatsink (Approximate
parts cost at GM dealer: $45)
Replace just the npn power transistor with it's radioshack equivalent. Make
sure to apply some dielectric grease. (Appoximate parts cost: $5)
If the dash lights still don't illuminate or do not dim smoothly as the dimmer
wheel is moved, the problem is likely with the dimmer rheostat itself or
the wiring between the rheostat and the remote dimmer.
Question or comments?
email me: [email protected]