| Part Number |
Description |
Suggested Retail |
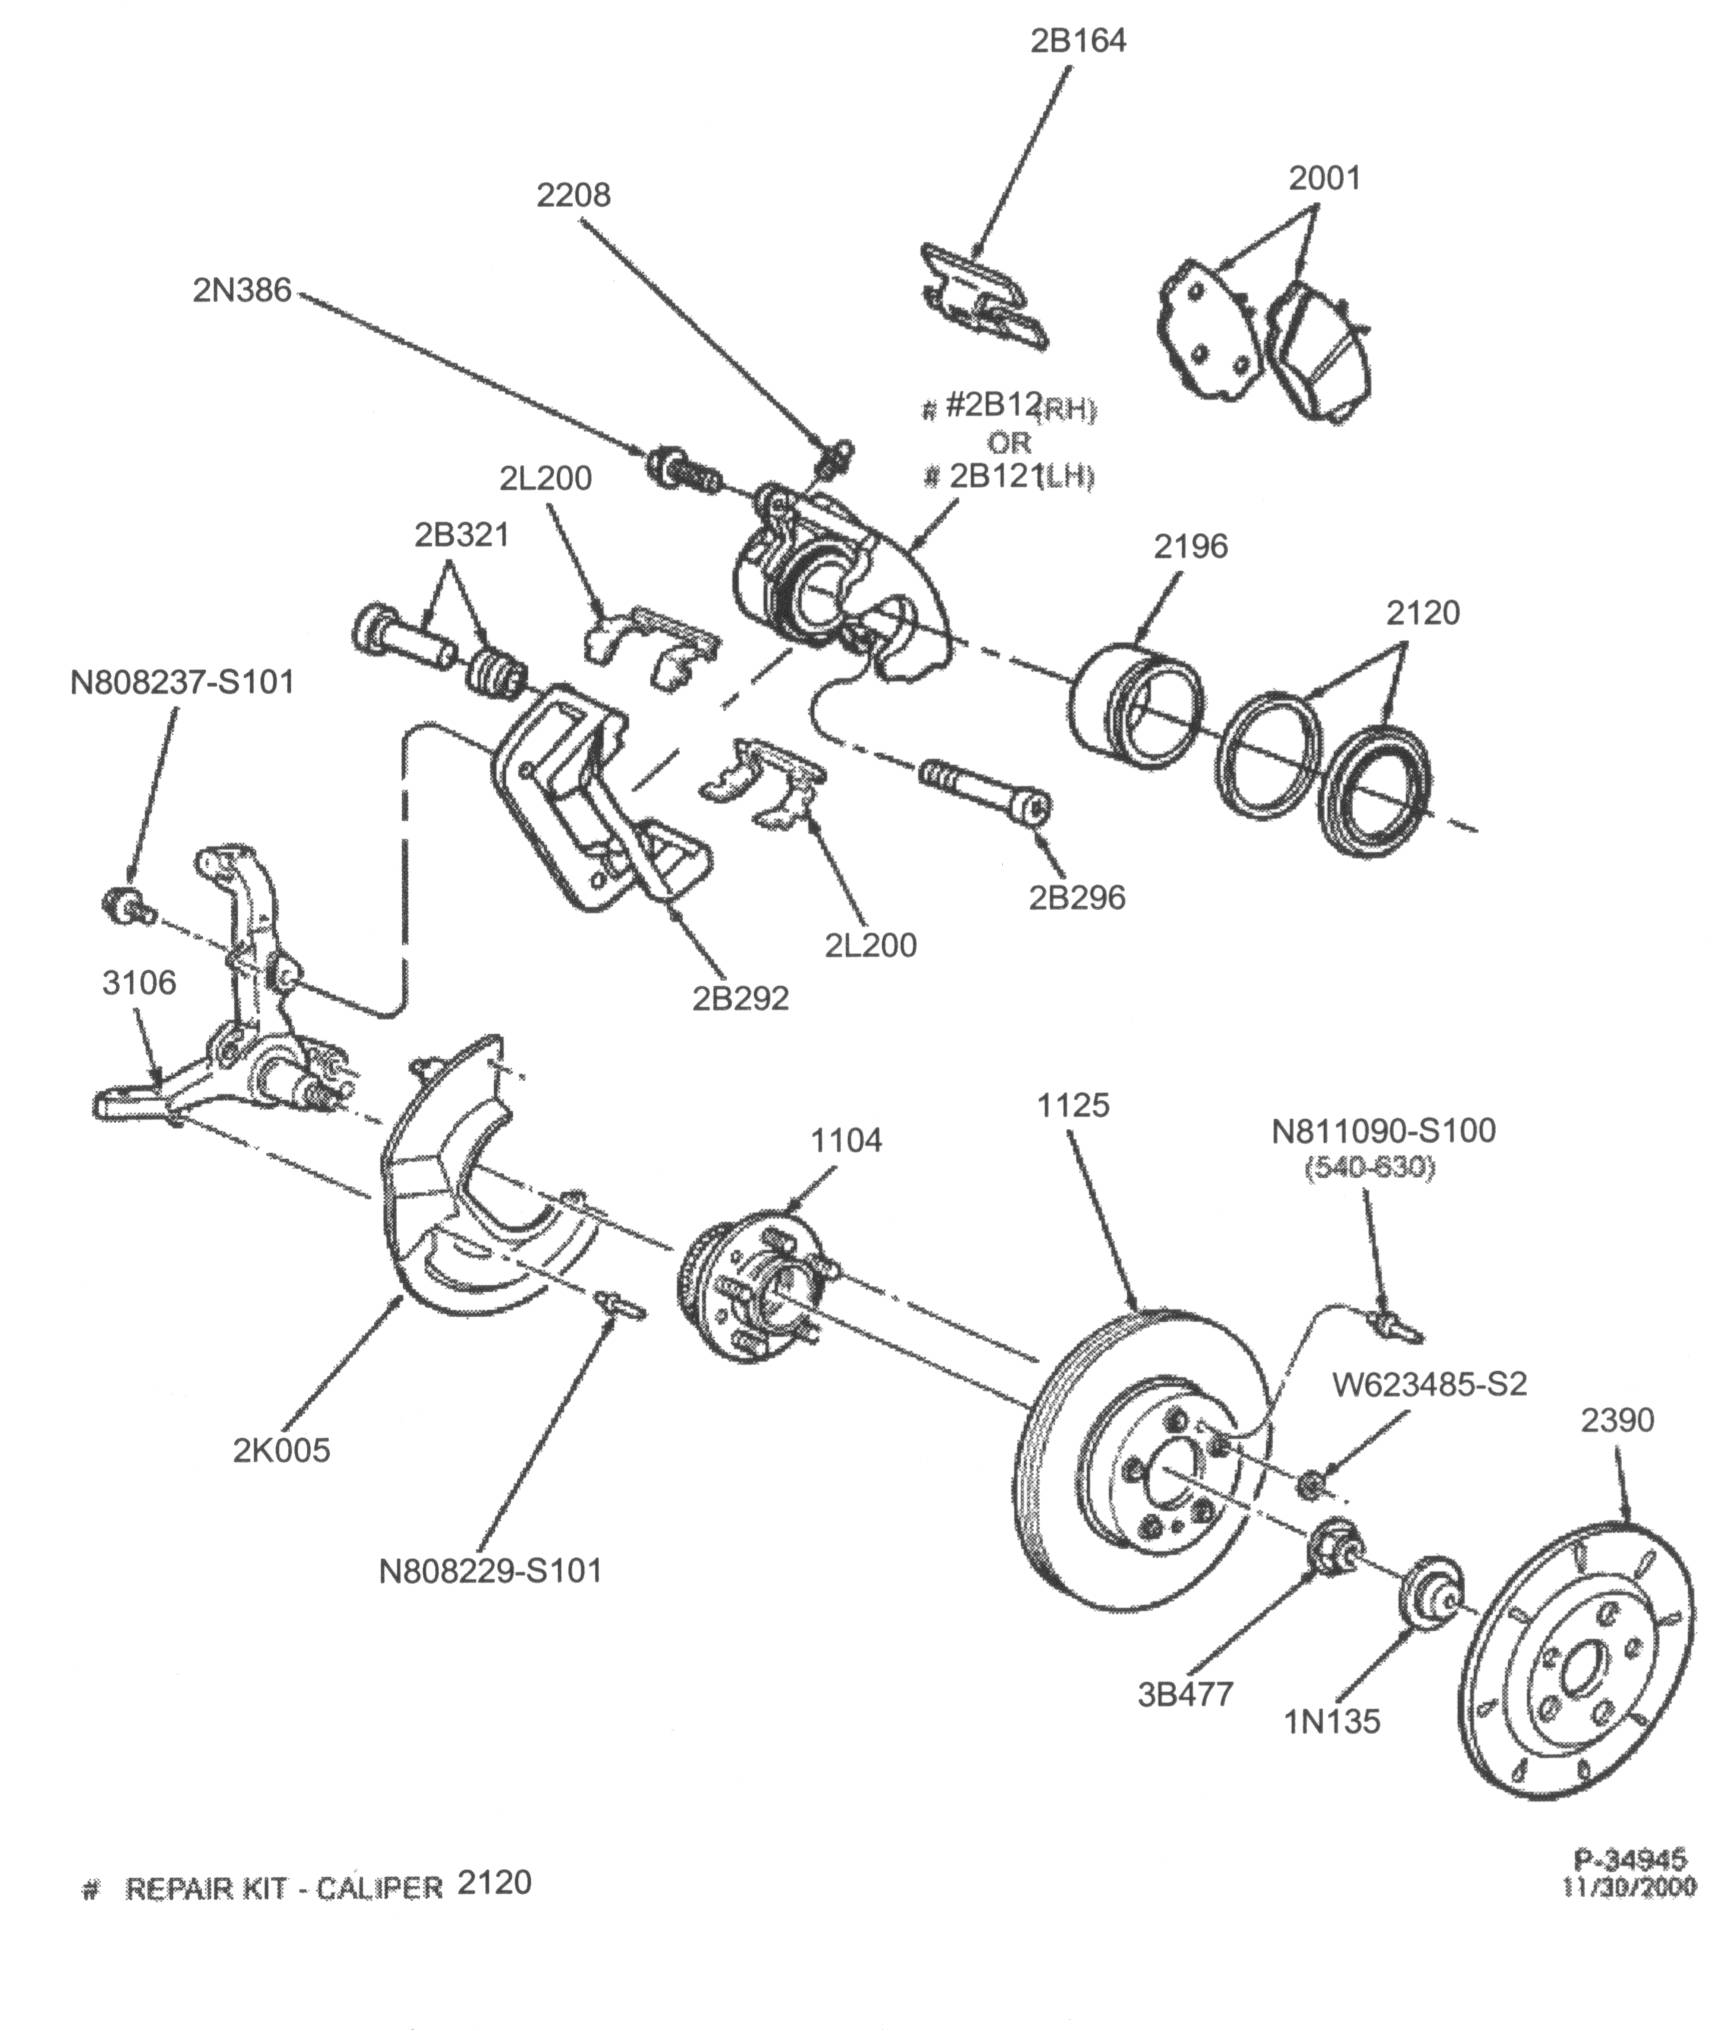
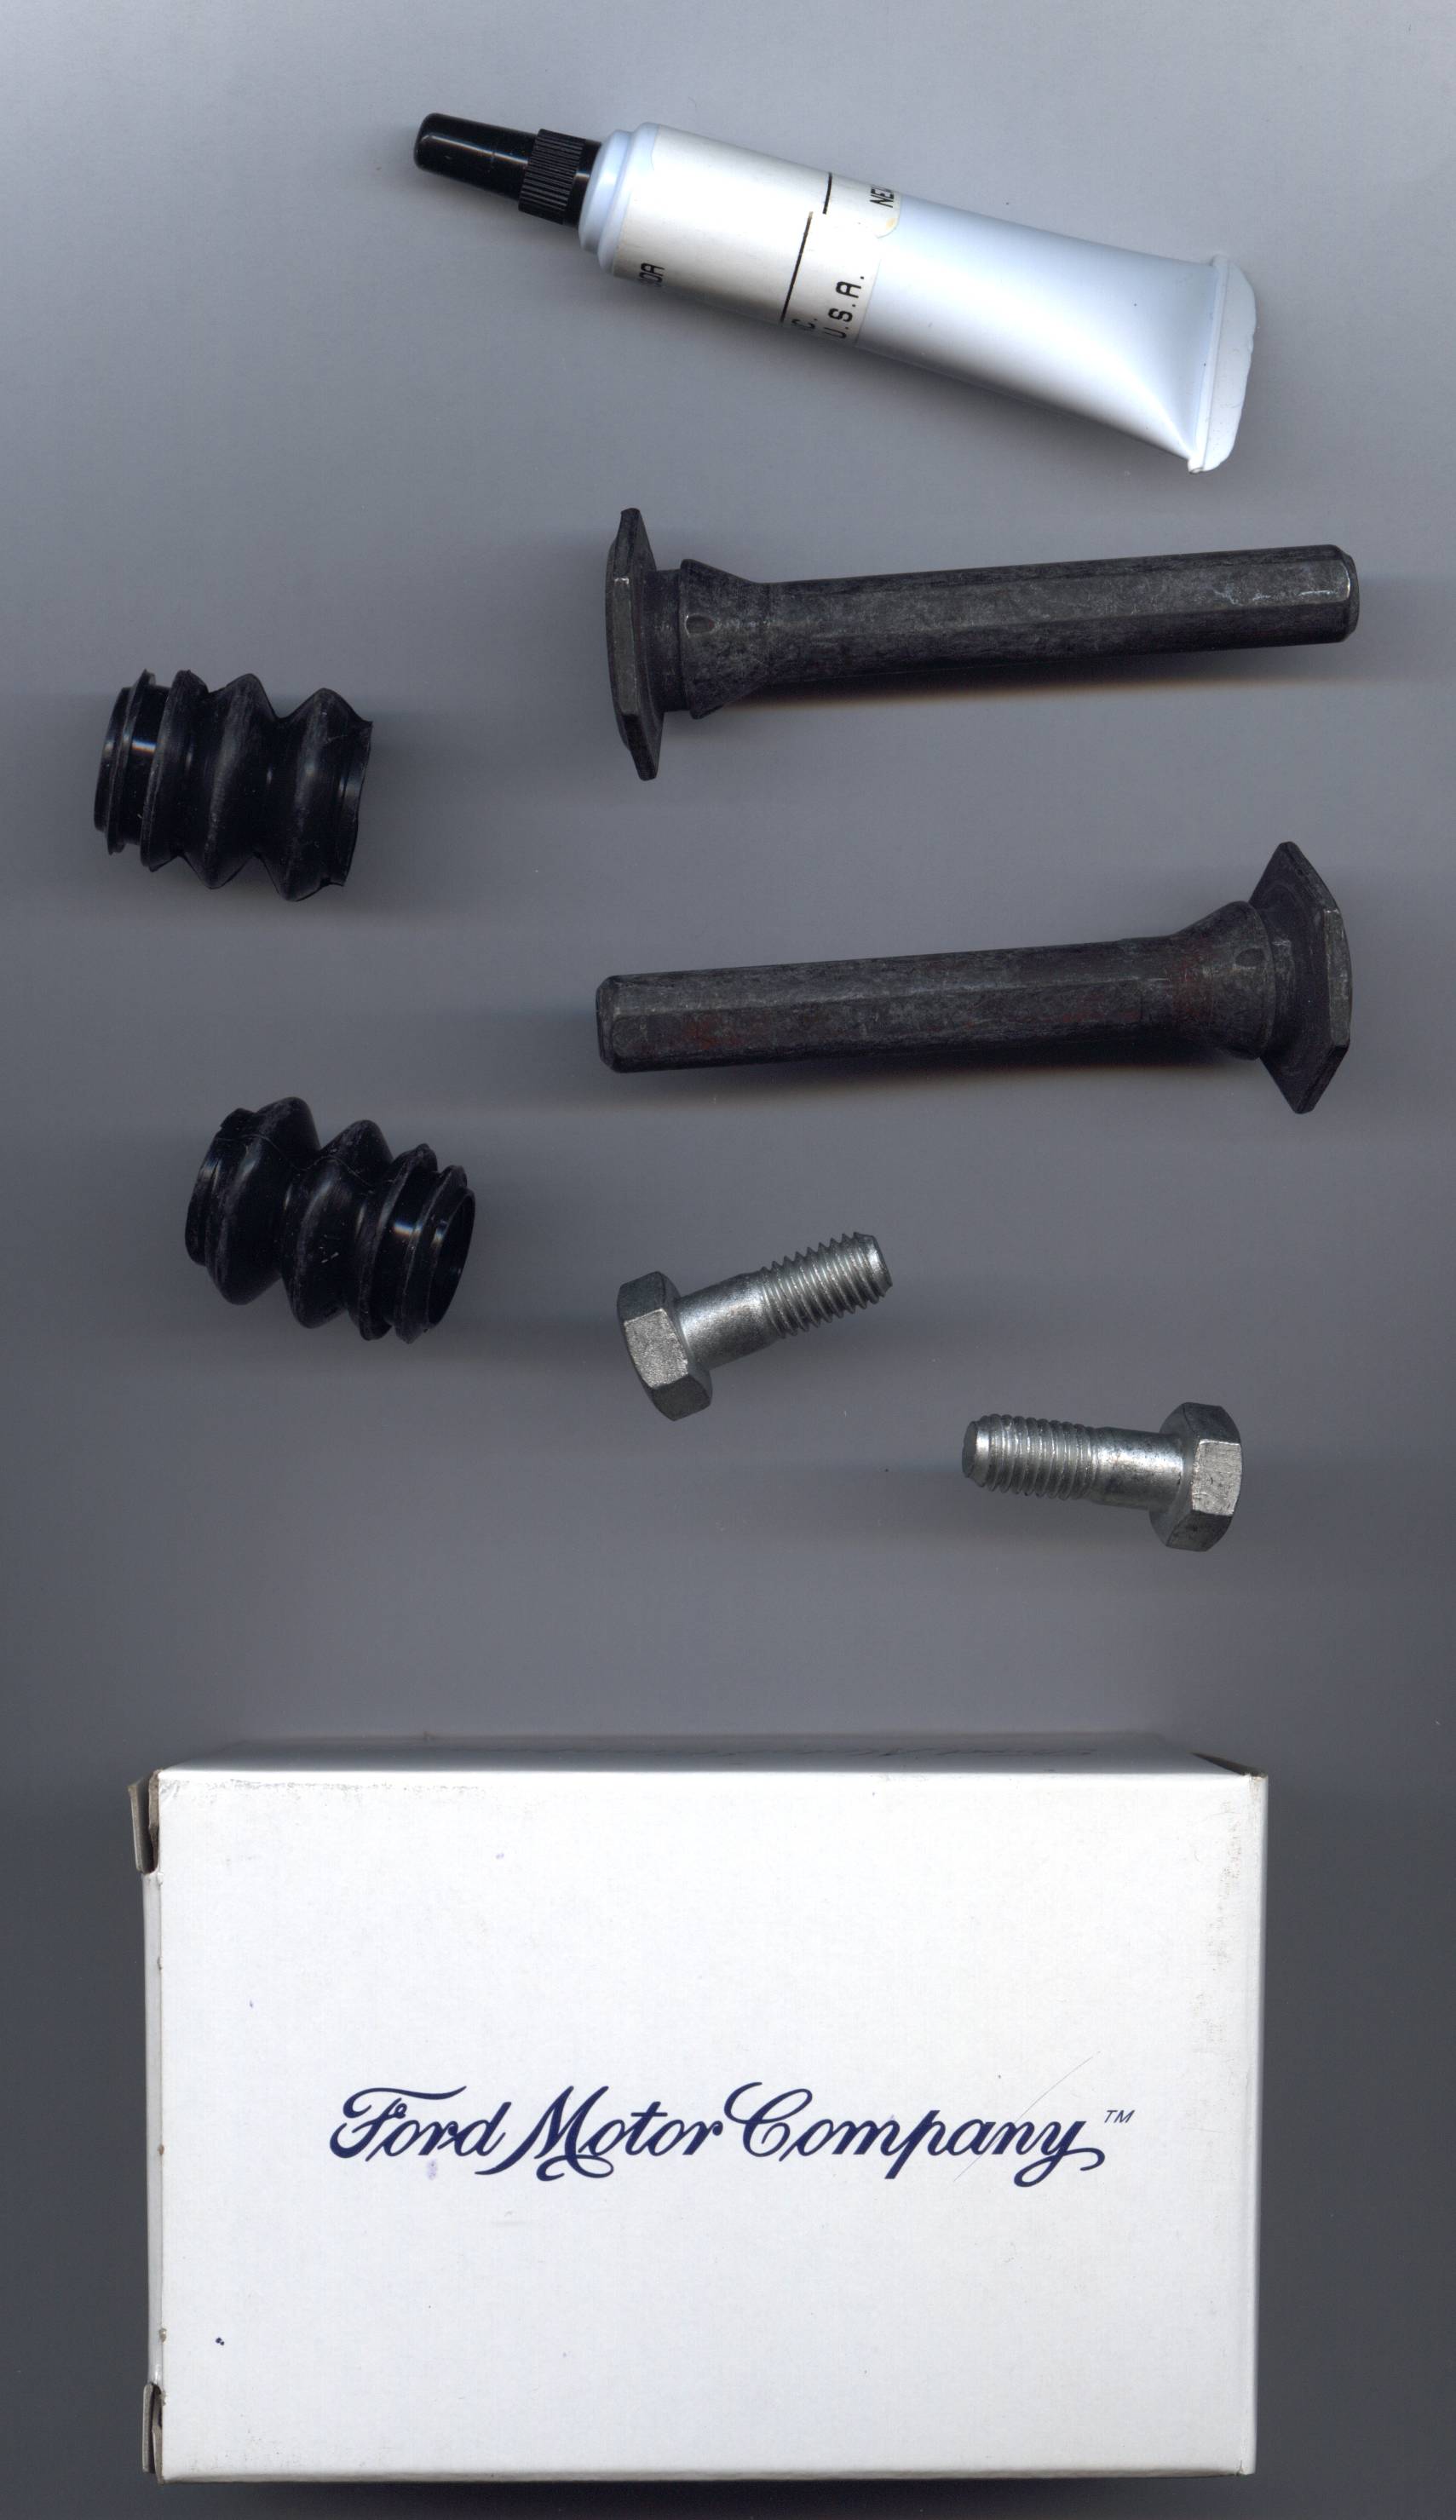
| F5AZ-2B296-A |
95-97 Front Caliper Pin Kit |
$39.95 |
| F8VZ-2B296-AA |
98-01 Front Caliper Pin Kit |
$20.75 |
| 1W1Z-2B296-AA |
01-02 Front Caliper Pin Kit |
$26.65 |
| F8VZ-2L200-AA |
98-02 Front Slipper |
$3.16 |
| YW7Z-1V125-EA |
98-02 Motorcraft Front Brake Rotor (BRR-64) |
$83.80 |
| F8VZ-1125-AA |
98-02 Ford Front Brake Rotor |
$125.70 |


| Part Number |
Description |
Suggested Retail |
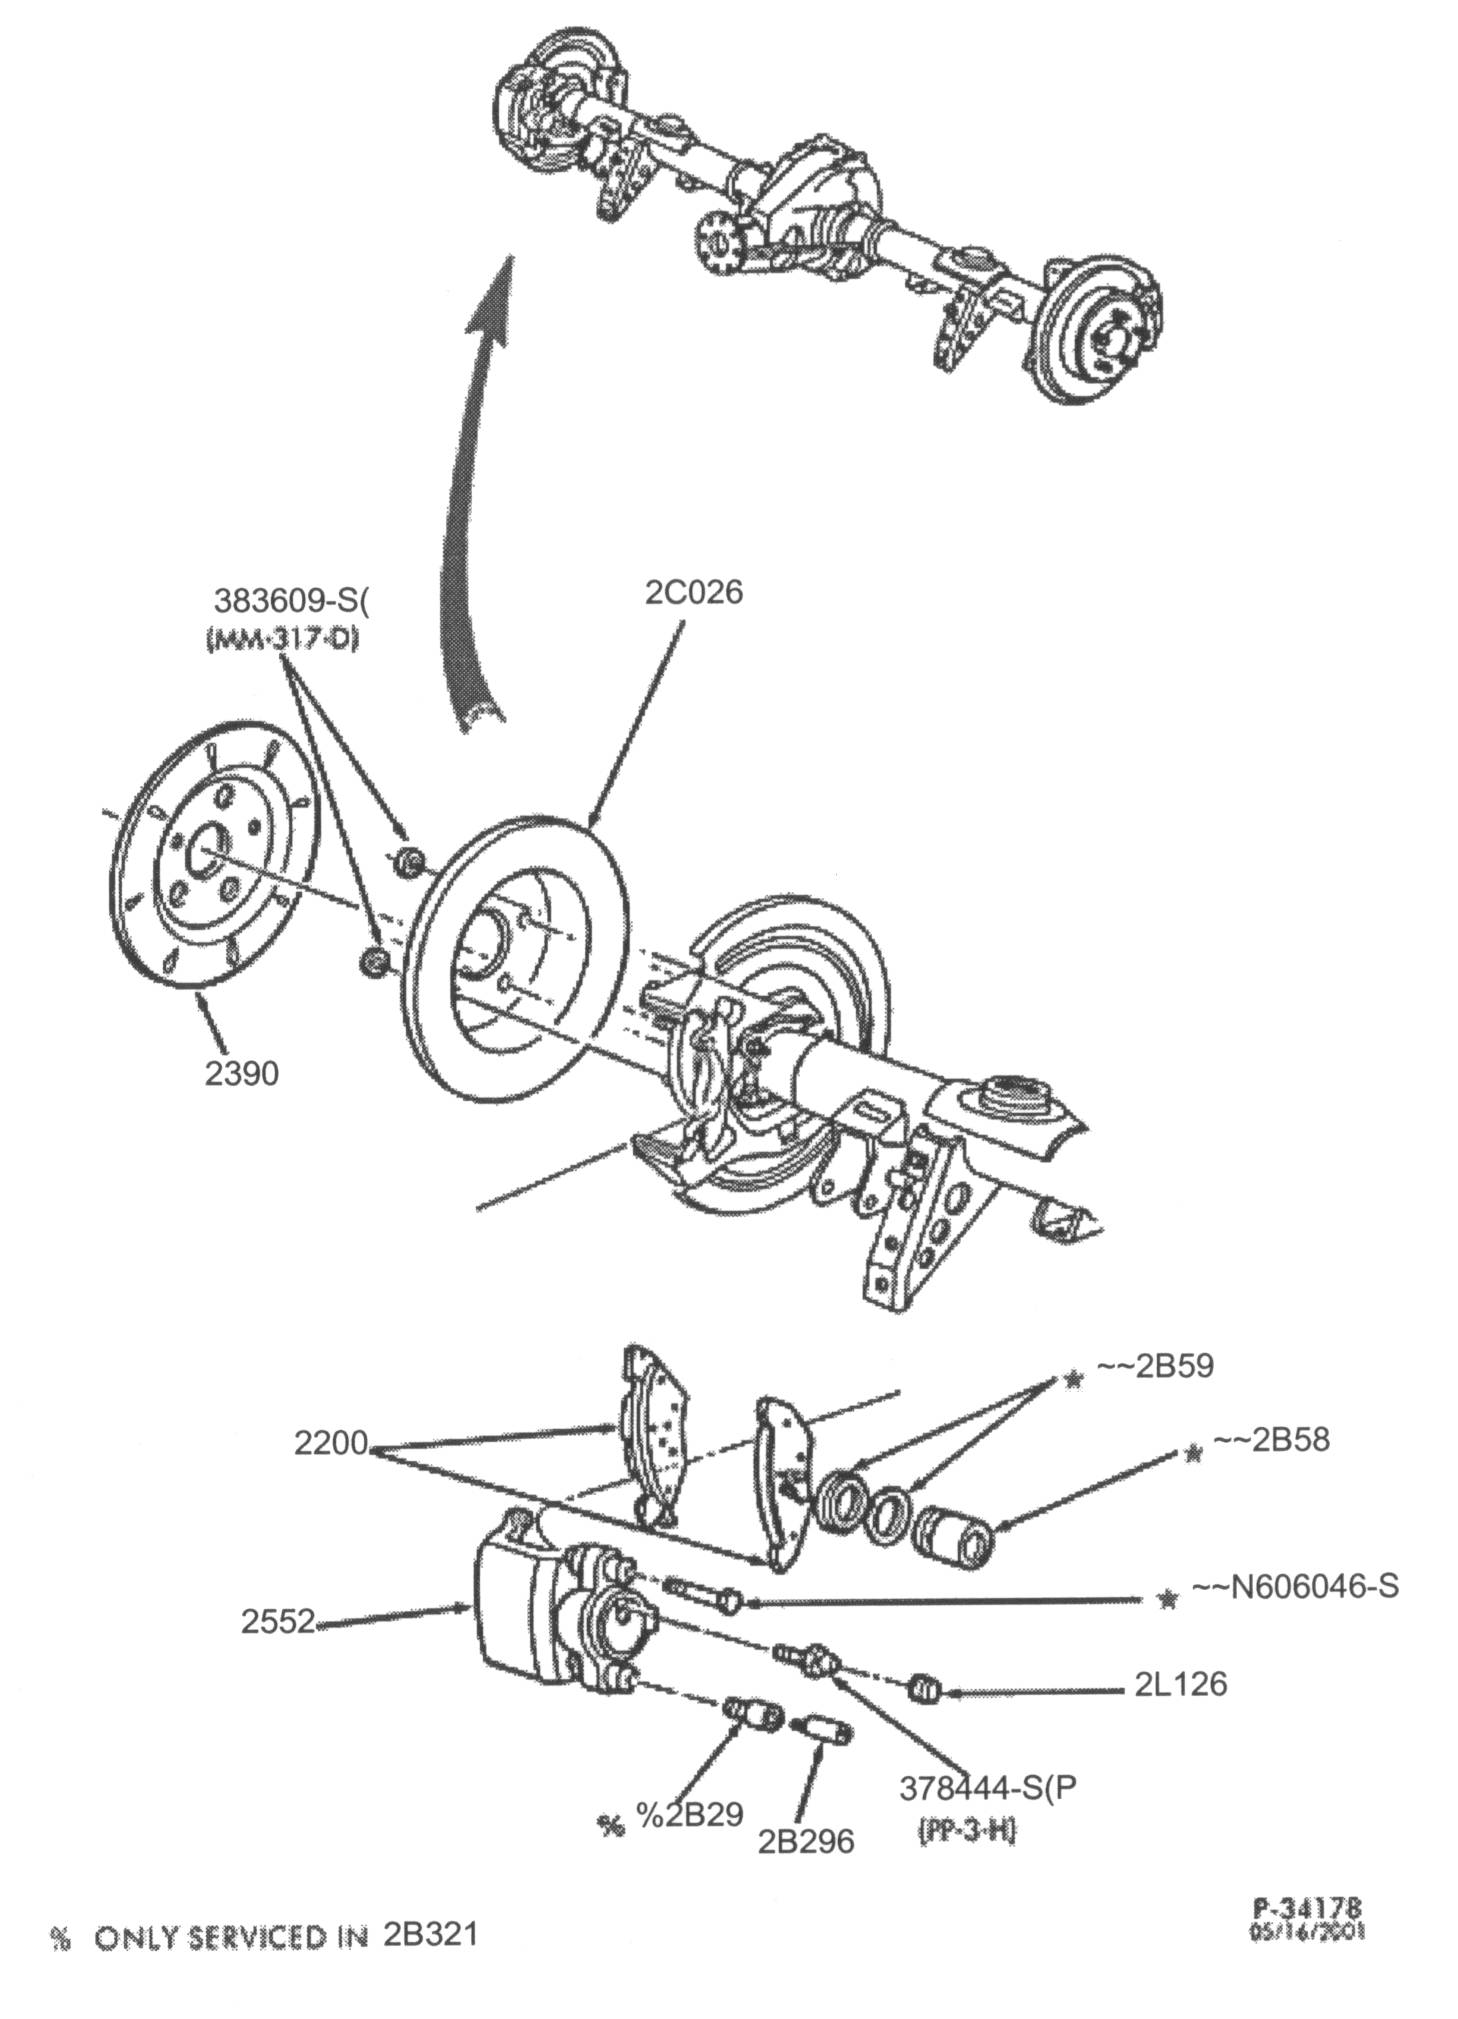
| F3AZ-2B296-AA |
94-99 Rear Caliper Pin Kit |
$5.36 |
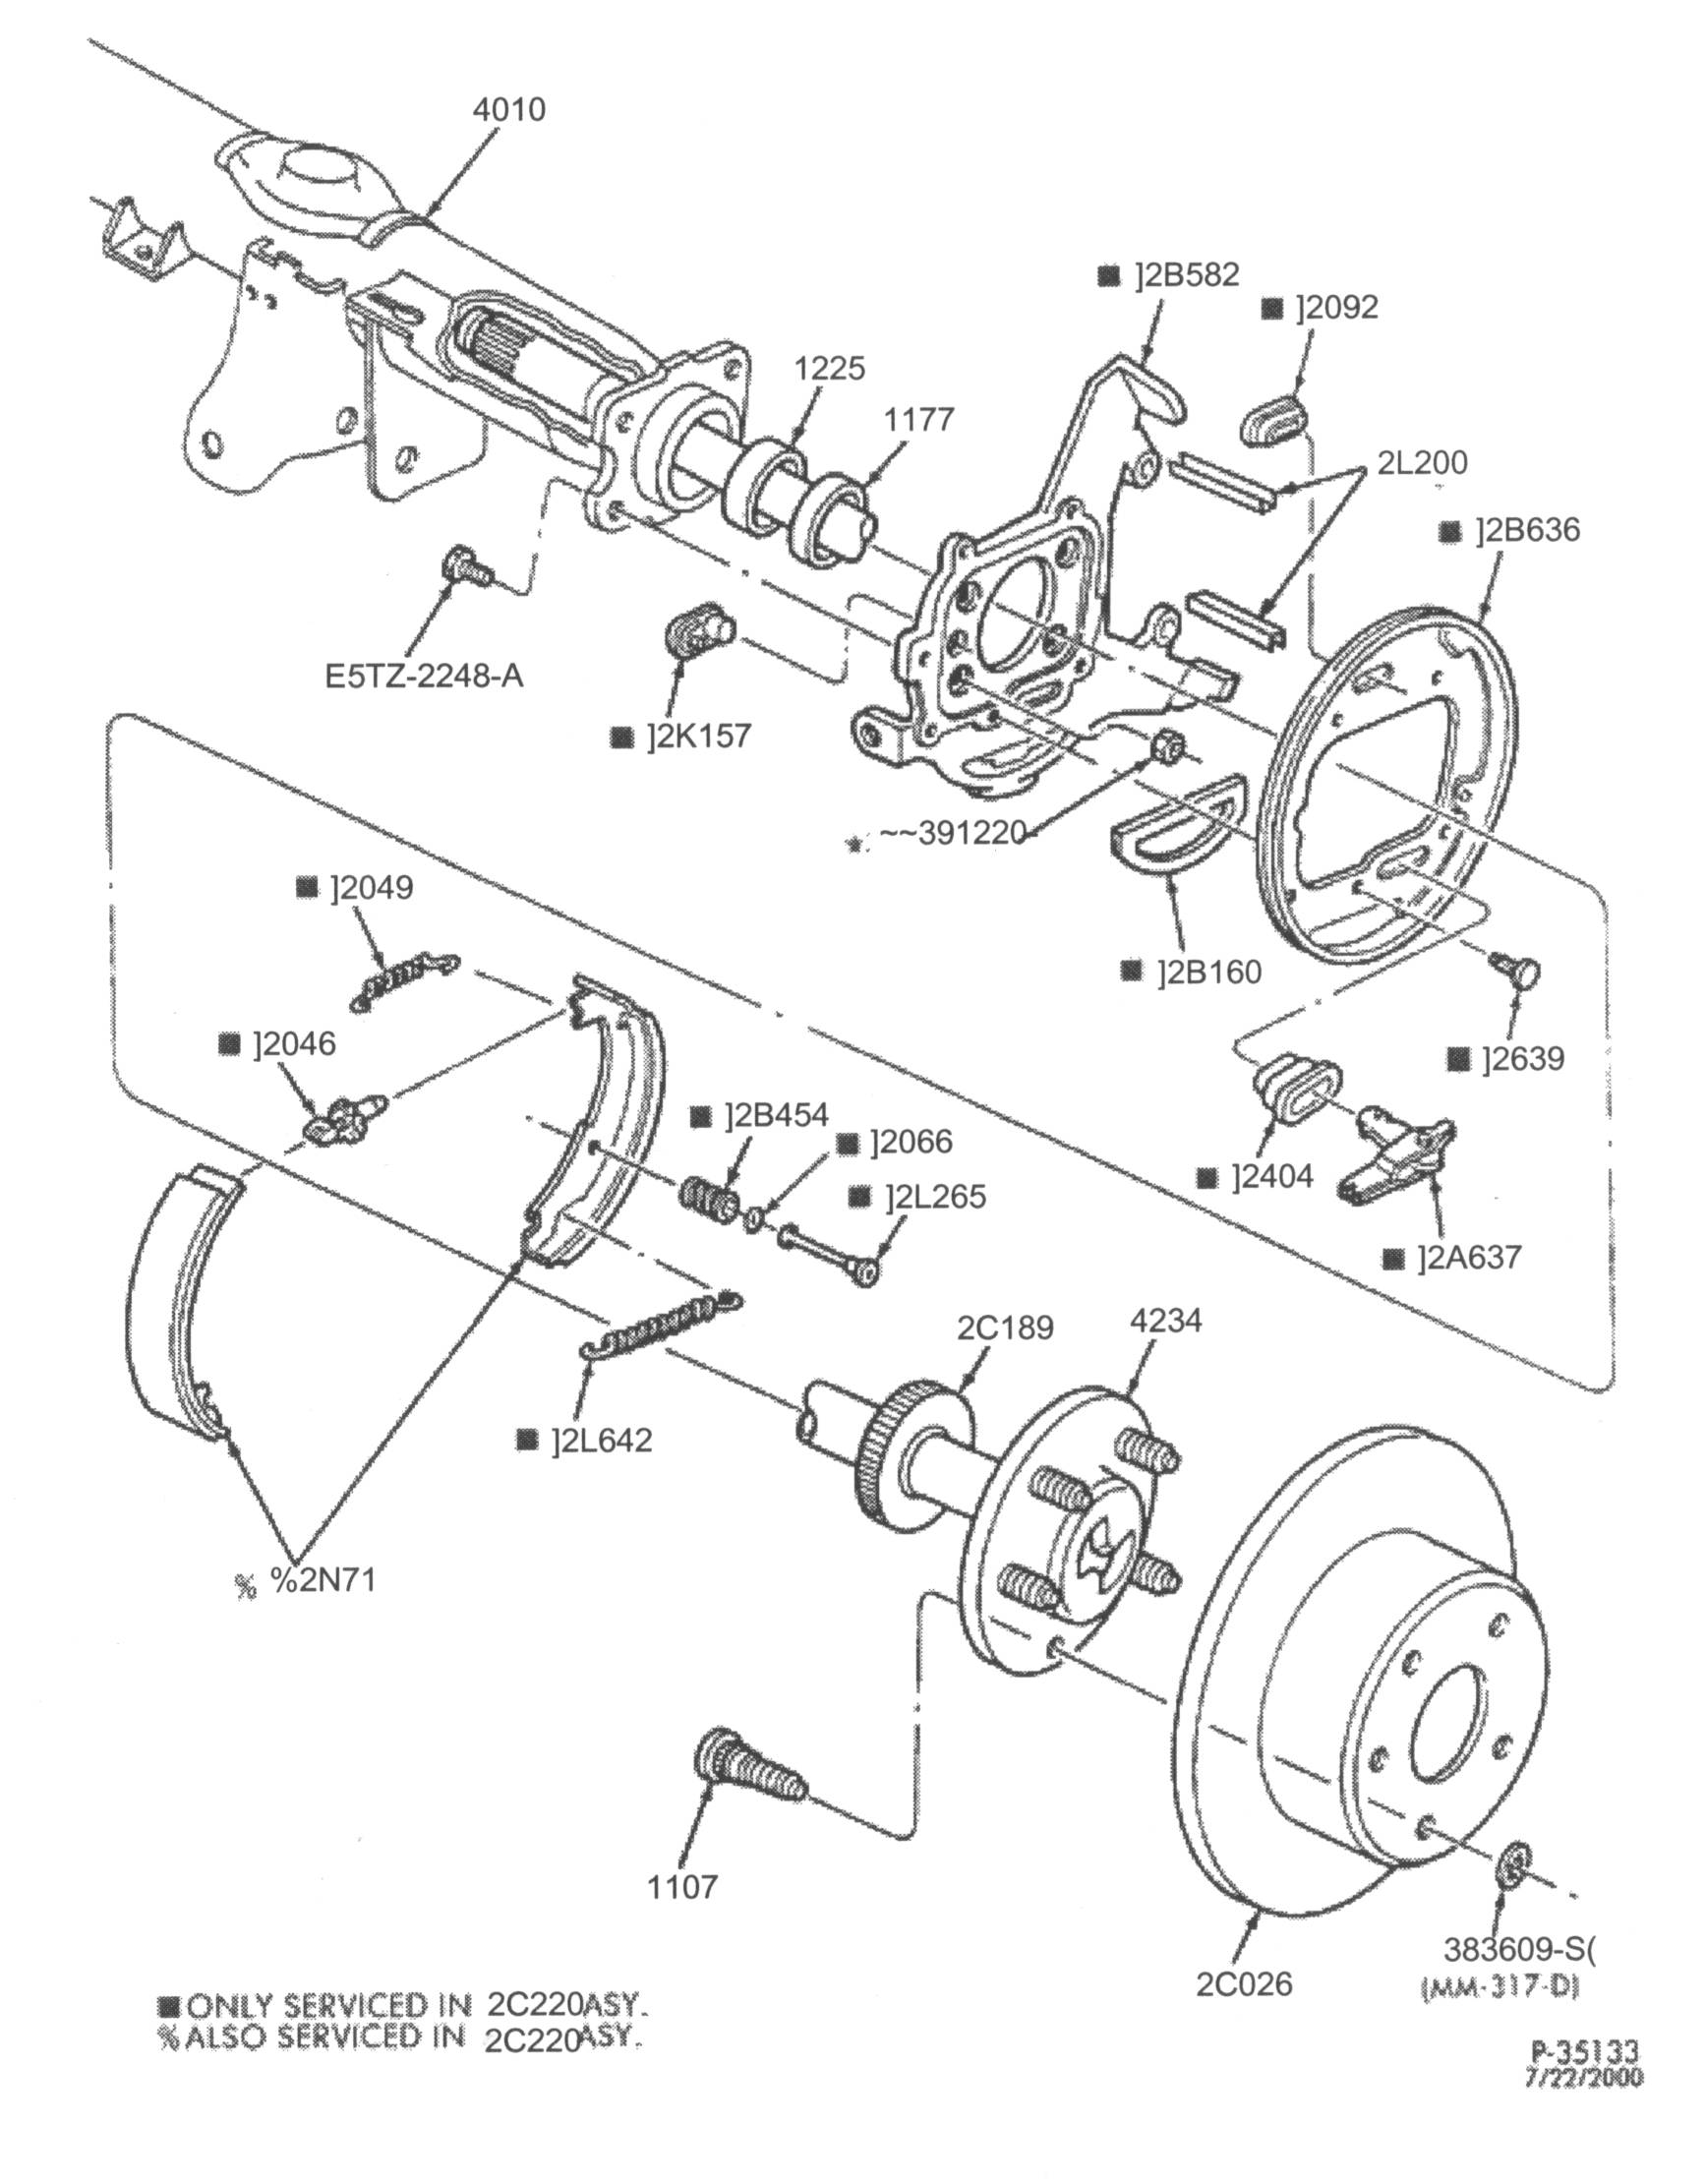
| F6AZ-2L200-AA |
92-02 Rear Slipper |
$1.66 |
| YW7Z-1V125-DA |
96-02 Motorcraft Rear Brake Rotor (BRR-61) |
$65.35 |
| YW7Z-2C026-AA |
96-02 Ford Rear Brake Rotor |
$98.03 |